I wanted to share with you how I made this beautiful sweater with ruffles. I usually don't follow patterns to make sweaters because I don't like counting stitches. So, instead I use my own measurements or the measurements of an all ready made sweater. I hope that with the help of photos you can follow my instructions.
For this sweater I used the Crochet Woven Stitch: Single crochet stitches worked in single chain spaces. Row 1: Sk 2 ch, 1 sc, ch1,1sc, ch 2, turn. Row 2: 1 sc in ch sp of previous row,ch 1, 1 sc in the turning ch sp, ch 2, turn. Rep from row 2.
To make the Crochet Ridge Stitch Ribbing: Ridges are formed horizontally, then turned sideways for ribbing. Row 1: Sk 1 ch, 1 sc in each ch, ch1, turn. Row 2: 1sc in back loop of each st, ch1, turn. Repeat row 2 for the pattern. When ribbing is long enough for the garment edge on which it is to be used, fasten off yarn.
For this sweater I used 16 ounces of yarn, sizes G/6-4.25MM and E/4-3.50MM hooks.
The directions given here are for size (M)
To make the Back Ribbing: Work a chain stitch (ch st) long enough that measures 4"
Follow the Ridge stitch ribbing pattern, 1sc in back loop of each st, ch1 turn.
Keep working in established pattern across. When ribbing is 16" long, don't fasten off, insert the hook into the edge and work 1sc, ch, 1sc, continue across, ch2, turn. Row2: 1sc in ch sp of previous row, work in established pattern across.
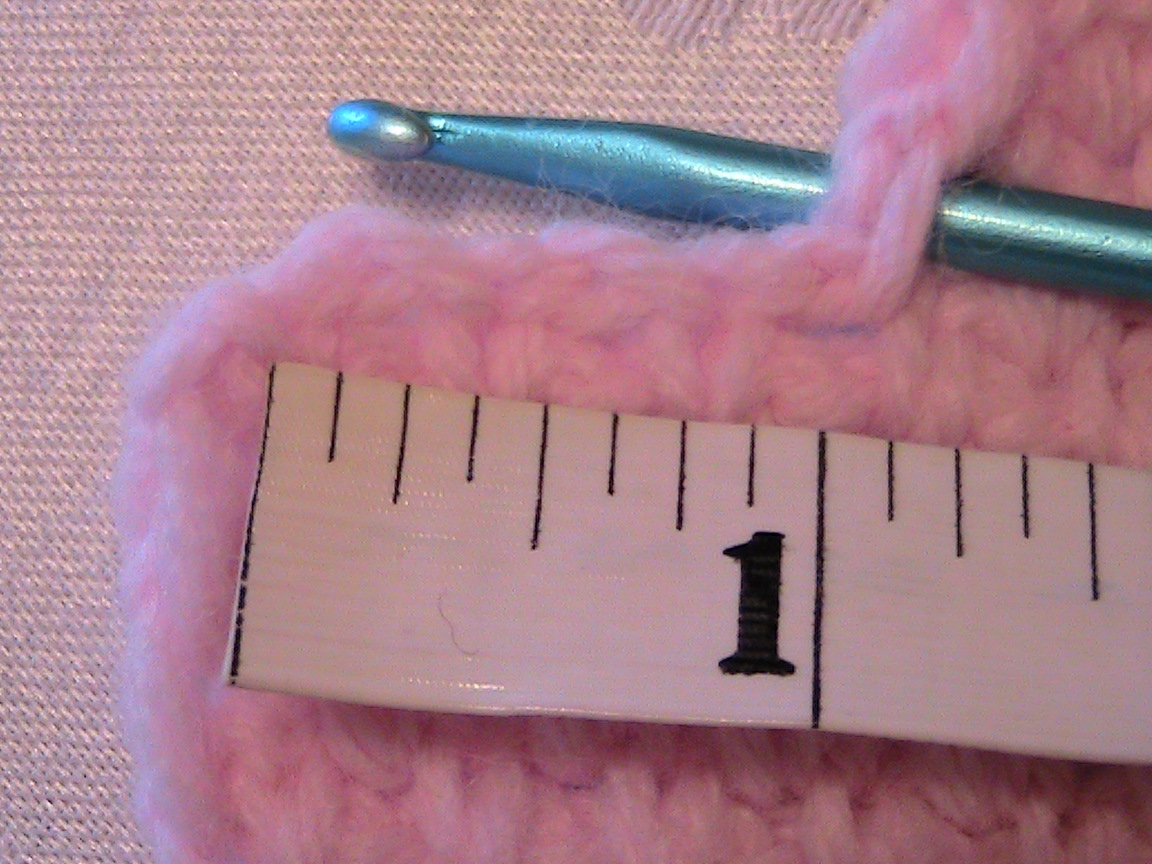
When the Woven stitch work measures 3" long from the foundation "edge of the ribbing",In the photo it looks like it measures 2"but it is 3" start (Increase) by working *1sc,ch,1sc,ch together in last stitch, turn, work in established pattern across, increase the other end edge*.Work from here until it measures 3".
The ending measurement is 10"X 18" wide (bust) from the biginning of ribbing to top.
Now for Armholes (Decrease) 4-5 rows, by leaving unfinished or skipping the last stitch in the row. This should measure 14 1/2" wide across.
Now work in established pattern until measuring 6 1/2"up. For shoulders band: Start at the edge, work 1 row that measures 4",turn, work row 2. fasten off. Attach yarn at the edge and work the other side of shoulder to correspond. (Measures 7 1/2" including the soulder band.)
Neck measures 6 1/2" -7"

For ruffle foundation: Attach yarn and Work sc,ch,sc,ch all in same stitch, (like increases) on each stitch across ribbing edge. Turn, work woven stitch on each stitch across, keeping the edges neat and straight. Measures 4 1/2" long

The shoulders width measures 14 1/2" , X 21 1/2"long
For Front : Work same as back side with the difference of measuring from the start of the armhole row, 3" up of rows. A V-neckline is usually started 6" bellow the shoulder, or just after the start of armholes shaping. Work is divided at the center and each half is worked separately, decreasing gradually at the neck edge. For a wide V, decrease 1 stitch every row, for a narrower one, every second or third row.
Mark the center with a piece of yarn. Work rows decreasing 1 stitch every row 4-5 times only on neck edge keeping the armhole edge straight until the shoulder band measures 4" keep working up. Measures 6" from the start of center row, fasten off. Attach yarn on edge and work other neck side to correspond.
Work ruffles same as back side. Sew sides and shoulders. You don't have to worry about right or wrong sides because the woven stitch is a double face pattern. Using E hook, begin at right side seam and work slip stitch: Attach yarn, insert hook through the stitches catch yarn, draw a loop though both the stitch and the loop on the hook.
For the Sleeve: Work a ribbing band of 3"X 12" long, don't fasten off, insert hook on edge and work 6 rows of woven stitch pattern, increase every 6 rows, 3 times, work 6 more rows, until measures 5"X 16" wide.
It's a good idea to mark the increases.
For sleeve cap: Decrease the last row by skipping the last 3 stitches, leaving a space that measures 1"
Now start decreasing every 3 rows, 3 times.
Now Decrease every row 3 times. Measures from the first decrease 4 1/2"
Work 1 more row straight across and fasten off. Make ruffle on ribbing. Make 2 sleeves. Sew sleeve seams, using E hook, working slip stitch. Attach to armhole. It is a good idea to secure seams together with safety pin, attach all around the sleeve and armhole seams. Press the seams (wrong side) lightly with the iron using a handkerchief underneath, spraying with water.
For ruffle: Attach yarn on ribbing edge, work sc,ch,sc,ch together on each stitch (like increases)Turn, work woven stitch on each stitch until it measures 1 1/2"long or desired length.
Scalloped edging: Worked along the neck and ruffles edges. Attach yarn, 1 slip stitch,* 3dc in nex st, sc, 3dc. All around the neck and ruffles edges. fasten off.
A snugger fit for the sleeve (Optional)
Is obtained by adding elastic thread to the ribbing. Thread the elastic after ribbing is completed, using tapestry needle and inserting it under the vertical ribs along each row on wrong side.
I hope that you understand these instructions. I had fun making this beautiful garment and I love the ruffles, it gives a touch of romantic charm. You may ask where I found my inspiration to make this sweater, well, I was reading my Romantic Country magazine of summer 2010 and I saw this photo from "VintageSoul1020.typepad.com" shop. What caught my eye was the beautiful ruffles on the pillows and floral rosettes. Just looks like a dress. So I decided to design this feminine sweater, I really loved how it turned out. I hope that you have fun making one too.
Have a wonderful day and come back soon!